This is a very simple recipe that only takes 3 ingredients, but it tastes really great!
Showing posts with label party. Show all posts
Showing posts with label party. Show all posts
Monday, October 26, 2026

Sunday, August 25, 2013
Rainbow Soap and Samples

I made rainbow soap yesterday - a double batch! Which for me, because I make very small batches, means 16 - 5 ounce bars.
Rainbow soap looks easy, but it's not. I am always racing the soap! First, trying to get it to a thick enough trace that I can pour it (gently! very gently!) and the layers won't swirl together. BUT I don't want it too thick or the layers will separate and there will be air pockets - not attractive.
So first waiting for the batter to thicken up and then racing, racing fast! to get the layers poured and leveled. I bang the molds on the floor after pouring each layer - to get the air bubbles out.
Now double everything by 2, because I was making 2 batches at the same time.
I think it turned out pretty :)
And was worth the effort!

I love my herb and clay colored soaps, but rainbow soap makes me happy! I smile every time I look at it.

This is 2 batches - 16, 5 ounce bars.

Then I cut each bar into 1/3. Why? Because I am participating in the October Tantalizing Sampler. So if you want to try one of these beautiful rainbow soaps scented with Lemon Honey (secret blend of essential oils developed by me!) sign up for the October Tantalizing Sampler! :) Or you can get a full sized bar in my Etsy shop Kiyi-Kiyi. There is a limited supply :)

Rainbow soap = HAPPY!!!
Friday, August 24, 2012
DIY Fancy Crayons

I saw a cute idea on Pinterest and I had to try it out for myself.
There were a few things I learned while making these: Using an ice cube mold doesn't work as well as a candy/muffin mold. The ice cube mold melts a little bit and the crayons don't release cleanly from the mold. See pictures below.
I tried using some WD-40 in the ice cube mold, but the results were the same.
Also, it takes quite a while to melt crayons - much longer than the 30-40 seconds that the tutorial on Pinterest said. More like 5-6 MINS. Check on them often to make sure they are melting.
Thirdly: It pays to put the mold into the freezer before you try to remove the crayons. Just let them warm up a tiny bit before you try to remove them or (if you have little details like arms, legs) they will break.
How to:
Remove the wrapping from some crayons.
Break crayons into pieces and place in mold.
Melt crayons in molds - Microwave 5-6 mins on High. Check often.
Place molds with melted crayons into freezer for 5-10 mins.
After removing molds from freezer allow crayons to warm up and then remove from molds.
Ta da! Fancy crayons!


Candy mold men. Lots of colors!

Wednesday, July 11, 2012
40th Anniversary

It was my parent's 40th wedding anniversary in May. These are pictures from the anniversary dinner at my house.


Flowers from my garden.


The dinner.

Monday, November 22, 2010
Mini Pita Biscuits

I like the idea of biscuits.
The easy to roll out, perfectly round, individual portions - in other words the Perfect Biscuit. However, I have never discovered this holy grail. Most recipes leave you with a messy counter, crumbs of flour and butter and are hard to mix together. If a recipe says anything about 'pea sized' bits of cut in butter, I know I won't have fun making that recipe (even though I will probably suffer through making it).
Yesterday, I was planning on making pizza, so I started to make some dough. I only had 2 hours to make it from yeast poof to eat, so I decided to make my favorite pita bread recipe for the crust. Then I thought, "Why can't I make this dough into biscuits?"
And Behold! The Mini Pita Biscuit was made!
This dough is really nice and easy to handle. It is dream dough! The pita biscuits are crisp on the outside and soft on the inside AND they still taste great the 2nd day.
Mini Pita Biscuits
3 cups all-purpose flour
2 tsp instant (also called: fast acting or bread machine) yeast
2 tsp baking powder (secret ingredient!)
2 tsp sugar
1 1/2 tsp salt
1 cup water
2 Tbs veg. oil
Combine all the ingredients to form a shaggy dough. Kneed dough for 5 mins. in an electric mixer or 10 mins by hand, until it's smooth. Place dough in a lightly greased bowl and let rest in a warm place for 1 hour.
Heat oven to 500F degrees.
Turn the dough out onto your work surface - kneed gently a couple times- Roll out to about 1/4 inch thick (the thick the dough the higher they will rise in the oven). Cut into circles with a biscuit cutter or squares with a pizza cutter.
Place biscuits on lightly greased cookie sheets and bake for 5 mins until golden brown.
Remove from oven and enjoy!


Monday, January 25, 2010
Romancing the Potato Dinner Party
 I had a dinner party on Saturday for some friends.
The theme was potatoes.
In the spirit of Antoine-Augustin Parmentier I held a dinner party with potatoes in every course - even dessert!
~
I'm not posting all the recipes in this post, but to see the recipes and more pictures of each dish, click on the name of the course below.
Rosemary Focaccia
Leaning Tower Salad with
Zesty Vinaigrette
Smashed Purple Potato Crab Croquettes with Choron Sauce
Sweet Potato Gnocchi with
Sage Butter and Parmigiano-Reggiano
Roasted Garlic Bianca Pizza on a
Crisp Parmesan Crust
And
Mint Ice Cream served in a
Chocolate Bird’s Nest
Leaning Tower Salad with
Zesty Vinaigrette
Smashed Purple Potato Crab Croquettes with Choron Sauce
Sweet Potato Gnocchi with
Sage Butter and Parmigiano-Reggiano
Roasted Garlic Bianca Pizza on a
Crisp Parmesan Crust
And
Mint Ice Cream served in a
Chocolate Bird’s Nest
 Menu
 A bit more about Parmentier.
In the 1700's the French believed that potatoes were poisonous.
Parmentier was a prisoner of war in Germany, were potatoes were eaten. In fact, the king of Germany threatened to cut off the noses of peasants if they didn't plant potatoes.
When Parmentier returned to France he tried to encourage potato eating. He used publicity stunts such as hosting dinner parties where potatoes featured prominently. He also planted potatoes and then posted guards around the garden to protect the "valuable jewels" aka potatoes. Then he instructed the guards to accept all bribes and leave the garden unattended at night, so the populace could steal the potatoes.
 I made place mats to protect my silk tablecloth.
I was saving this tablecloth for a very special occasion and the place mats really did their job!
There wasn't a spot on the tablecloth after dinner.
To make them I used thick card stock, each piece was 12inX12in.
I used a paper punch to add a decorative border.
 My Dad helped me pull the table legs out.
Then he fell asleep underneath the table!
 Me waiting for the charon sauce to cook down.
It took forever.
 The start of my flower arrangement.
 Almost done.
 Completed flower arrangement.
 Completed set table.
 This is my awesome friend Esmeralda.
 My friends on one side of the table.

And my friends on the other side of the table.
 Me waiting for the charon sauce to cook down.
It took forever.
 The start of my flower arrangement.
 Almost done.
 Completed flower arrangement.
Can you see all the butterflies?
I used flame less candles underneath tulle.
 Completed set table.
I put a card with facts about potatoes at each place with the menu.
Facts like: The average American eats 137.9 potatoes every year.
 This is my awesome friend Esmeralda.
She helped me serve - I could NOT have done it without her!
Thank you soooo much Esme!
 My friends on one side of the table.

And my friends on the other side of the table.
(Including my Mom and Dad!)
 The table all together.
 The table all together.
(Sorry Dad, you got stuck in the middle!)

Me being silly with the salad.
 Chocolate bird's nests with mint ice cream.

Leaning tower salad.
 Soup and potato cut outs.
 Rosemary foccacia.
 Sweet potato gnocchi.
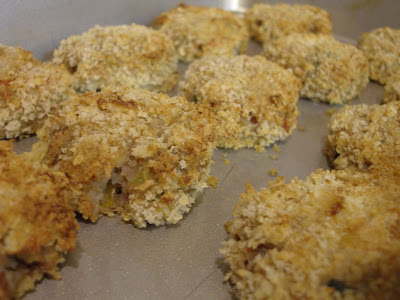 Crab cakes.
 Charon sauce.
 Bianca pizza.

Me being silly with the salad.
 Chocolate bird's nests with mint ice cream.

Leaning tower salad.
 Soup and potato cut outs.
 Rosemary foccacia.
 Sweet potato gnocchi.
 Crab cakes.
 Charon sauce.
 Bianca pizza.
~
Confessions and notes:
The only thing I forgot to serve were the limes wedges I cut up to serve with the crab cakes. The weather did NOT cooperate with me. We had unseasonably high temps (30F), slush, rain, snow and ice. I was happy almost everyone was able to come to the party. I shouldn't have put so much chocolate on the bird's nests - they were a *little* hard.
The only thing I forgot to serve were the limes wedges I cut up to serve with the crab cakes. The weather did NOT cooperate with me. We had unseasonably high temps (30F), slush, rain, snow and ice. I was happy almost everyone was able to come to the party. I shouldn't have put so much chocolate on the bird's nests - they were a *little* hard.
I could not have done it without the help of my Mom (who kept calling herself John - see here to understand the joke). Thank you so much for letting me use your house for the party!
And for putting up with me!
Also, Thank You to Esmeralda for your super, super help! You were great!
I had a ton of fun and would love to do it again.
It was stressful (tiny bit) and time consuming, but if my friends had a nice time then, it was totally one-hundred percent worth it!
Subscribe to:
Posts (Atom)